Showing posts with label Birthday party themes. Show all posts

Saturday, February 7, 2015

Easy Rainbow Birthday Party Theme

So I'm about a year late blogging Kyn's 4th birthday party, but better late than never, right? Kyn wanted to have a birthday party for her 4th birthday and I didn't want to plan one. I was pregnant, uncomfortable, tired, stressed with my job, and a bunch of other stuff going on. She wanted to have a few friends over and I just didn't have the energy to plan a huge party. 
I took the advice of my Mom. She reminded me that all parties don't have to be like the ones found on Pinterest and kids enjoy simple things. I swear I make things way more complicated than they need to be. 

Kyn was obsessed with rainbows at the time and asked for a rainbow birthday party. Unlike her 3rd Brave birthday party, this would be much simpler. Honestly, I have to remind myself that most of the amazing birthday parties that I love reading about have a huge staff of people to pull them off: cooks, bakers, decorators, professional photographers, etc. And not that I don't love planning birthday parties, but sometimes I just need simple. I am not super mom and I'm okay admitting that. 

The party was SO fun! It was fun and easy to plan, I bought most of the decorations from the dollar store, and the kids had a ball. I appreciate that children enjoy simple things. This party was a blast and the kids had so much fun. I literally planned and executed everything in a day and it was all last minute. She got fun gift and we all enjoyed our friends and family that came to wish her a happy birthday. My baby is getting so big. Where does the time even go? 

Here's what we did:

The decor: I went to the dollar store and went to the party section and bought plastic rectangle table coverings in all of the rainbow colors. I bought a package of balloons and made a little bouquet of them for the top of the backdrop. I taped all of the table coverings to the wall and then let them swoop down and secured them to the floor. I placed the balloon bouquet at the top and placed a "Happy Birthday" banner underneath the balloons. I bought a birthday balloon table covering for the main table and accented with balloons of all colors. 


The cake: Kyn really wanted a rainbow cake just like her 3rd birthday. As a surprise I made a pinata cake filled full of skittles. I got the idea from this YouTube video. The concept is really simple: you make 3 round cakes. The middle layer you cut out a hole, fill full of skittles, M&Ms, etc., place the top layer and frost. I decorated the top with Skittles and made a rainbow. I used marshmallows for the clouds. It was so fun to cut into it and Kyn's face when all the candy fell out. :) I made a marbled rainbow cake and the kids loved it. I used the concept from Hub Pages. I loved how colorful in turned out! The marbled cake takes time to do, so if you are in a pinch, you could do 3 different colors and it would still tie into the theme. 


I also make rainbow cupcakes using this idea. They turned out super cute and were perfect for one of the planned activities. 

The activities: We let the kids make Fruit Loop necklaces. We had several bowls of cereal on the table and pieces of yarn cut ahead of time for each guest. Smaller kids sometimes have a difficult time stringing the Fruit Loops so we made sure to put a piece of tape at each end.
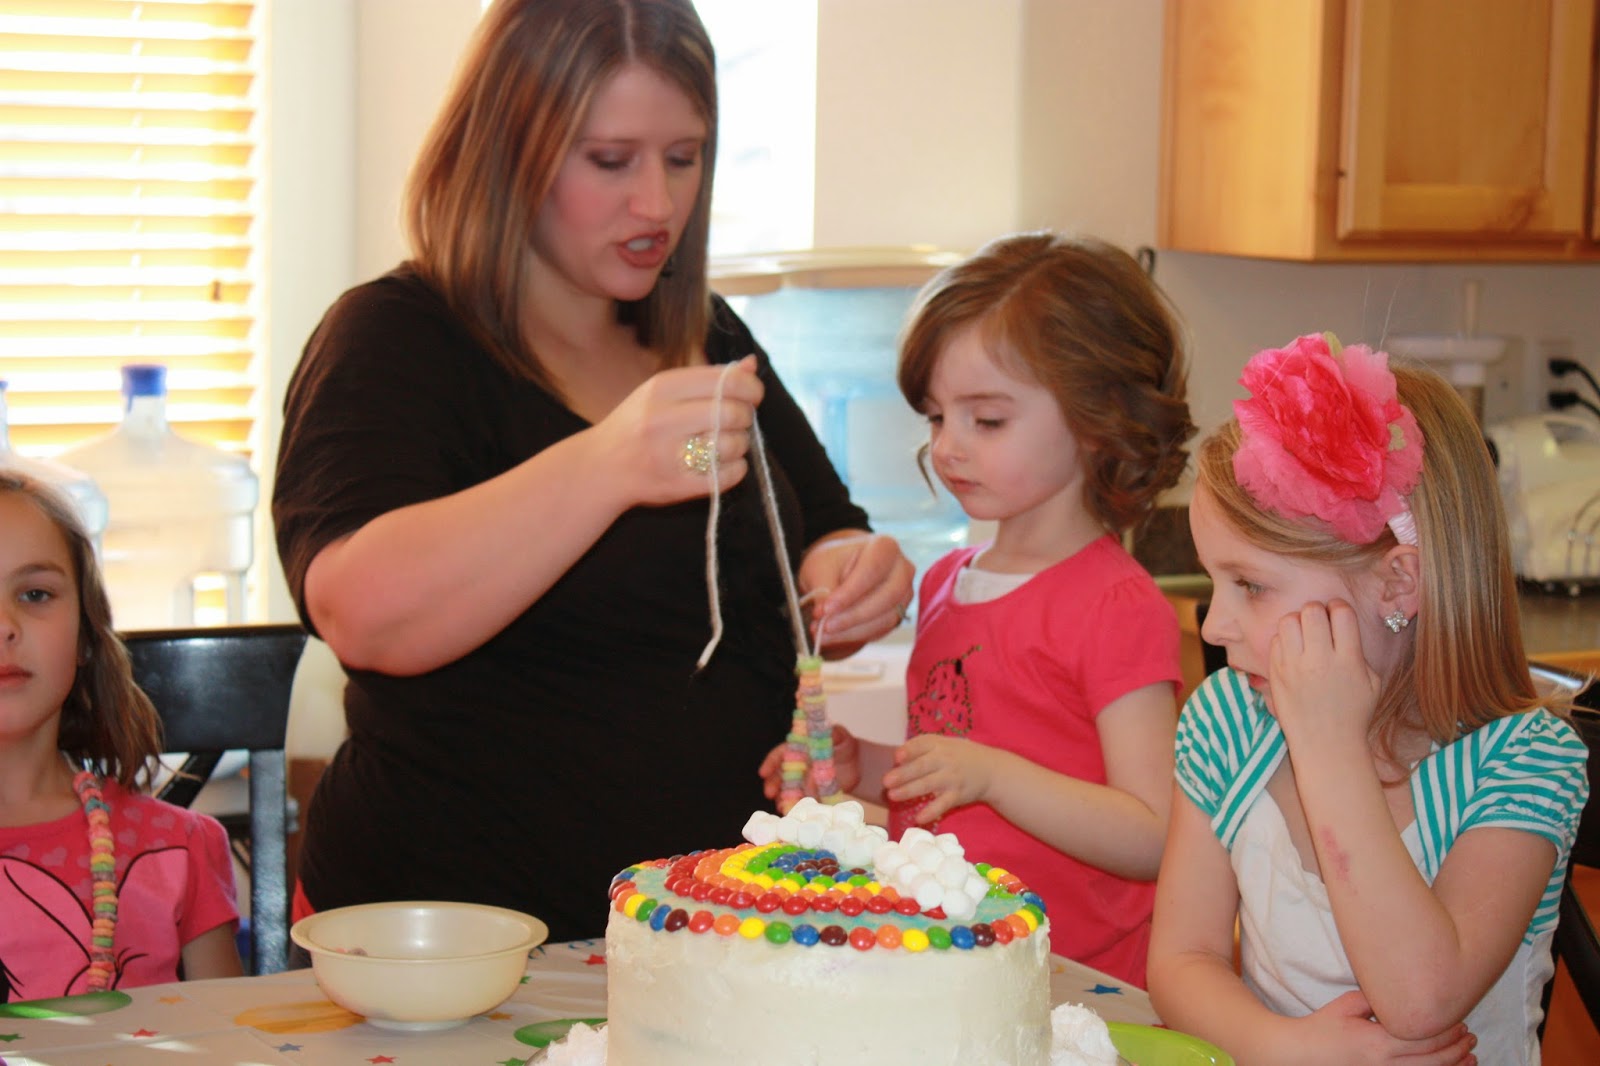


The second activity that we did was let the kids decorate the rainbow cupcakes. We had all sorts of rainbow colored candies: Skittles, M&Ms, sprinkles, rainbow Twizzlers, marshmallows, Pixie Sticks, Gummy Starbursts, and SweetTarts. If you have a bulk store in your area (I LOVE Winco) you can probably find all sorts of fun colored candies for decorating with. We made each of the kids a little bag with candy so that it was easier for them to decorate and helped control the candy chaos. I used the leftover frosting from the cake and we let the kids go to town. I think more candy ended up in their bellies than on the cupcakes, but hey, that's what parties are for! 


The favors: I bought the rainbow Twizzler licorice, marshmallows, and snack-sized zip baggies. I put some licorice in the bag in the shape of a rainbow and put marshmallows for the clouds. I stapled a cloud with each guest's name on it in rainbow colors. This was a really fast and simple "thank you" for each guest that came. I loved personalizing them, too. 


Kyn had so much fun with her friends and family. She got an Anna doll, a Hello Kitty spa set, some movies and a bunch of fun toys. 


Monday, June 10, 2013

Giant S'more Cake

I love planning and putting together birthday parties for my kids. We have a tradition to invite our whole immediate families to our children's first birthday. Since my daughter was born in the summer, I thought it would be perfect to throw an outdoor/camping themed party. I haven't had a chance to blog about the whole party, so stay tuned.

I wanted to have a s'more bar, so I thought it would be perfect to make a giant s'more for her birthday cake. I found the original idea on the Not Just a Housewife blog. I took those concepts and created my version of the S'more cake. I loved her idea for making the homemade graham cracker. The dough was so good and it was perfect being made in advance. It's a really great recipe and worked nicely for the cake.

I made (2) 9-in round chocolate cakes since we were going to be serving a lot of people. Although the giant graham crackers are so cute and even taste delicious, I didn't think people would want a big hunk of cracker with their cake, so I opted for a graham cracker cream filling. I have to tell you, the filling was to die for. I'm not usually a big graham cracker fan, but it totally worked with this cake. I wanted the cake to look like a real S'more, so I opted for marshmallow frosting (AKA "7 Minute Frosting") that could be toasted with a kitchen torch (thanks to my awesome friend, Missy, for that great idea). I also wanted the chocolate to look melted, so I thought chocolate ganache would be a perfect addition for that. 

So I didn't do a practice run with this cake before my daughter's birthday, so this was all trial and error. The flavors were so yummy, but there were a few aesthetic hiccups that I had to figure out the day of the party. So fortunately for you, you can learn from my mistakes. The biggest problem is that I made the graham crackers way to big and they were too thin, so they were kinda droopy when the top was placed. I did them a little bit smaller than a standard baking sheet. The next time I make this cake I will make them each about 10"x10". That way they are slightly bigger than the cake, but you won't have to deal with any droopage. :) Also, always always ALWAYS work with frozen cakes when you frost them. That prevents all of those little cake crumbs from getting in your frosting. It's especially important when using the marshmallow frosting. Seriously, frozen cakes are so much easier to work with.

So here's what you need. I'm going to separate it into each component:

Cake:
(2) 9-in round chocolate cakes, baked and frozen

Homemade Graham Crackers: (slightly adapted from Not Just a Housewife)
-1 C butter (2 sticks)
-1 C brown sugar 
-1/2 C dark corn syrup
-1 tsp. pure vanilla extract
-1 1/2 tsp baking soda
-4 C all-purpose flour
-4 TBS cold water

1. Preheat oven to 375 degrees. Cream butter, sugar, corn syrup and vanilla together in a medium mixing bowl. Add baking soda and flour and mix until incorporated. Add 2 TBS of water and continue stirring. Add a TBS of water at a time until you have a dough-like consistency. My flour was more dry, so I used all 4 TBS of water. 

2. Chill dough for at least 30 minutes before rolling out. Do not skip this step or the dough will be super messy to work with. 

3. Take a piece of parchment paper (mine is the size that fits a standard baking sheet) and sprinkle a little flour on op. Take half of chilled dough and begin to roll it out. You want it about 1/4" thick. Roll it out bigger than you need so that you can cut clean, crisp edges. Cut your rolled dough with a pizza cutter into a 10"x10" square. Repeat for the other cracker. 

4. Take a wooden dowel and make an impression in the middle of the dough. Then take the end of the dowel and make the circular impression to resemble a real graham cracker. 


5. Transfer the piece of parchment paper with the rolled out dough on top and place on a baking sheet. Bake at 375 degrees for 13-15 minutes until cracker is golden brown. If you bake less time then you'll have a softer texture, so make sure to bake enough time to ensure a cracker-like consistency and so that it doesn't fall apart when you assemble your big S'more. Remove from oven and allow the cracker to rest 5-10 minutes before transferring the parchment paper (with the cracker on top) to a cooling rack. Allow to cool completely before assembling your cake. 


Graham Cracker Filling:
-(1) 8oz. cream cheese, room temp
-3/4 C canned marshmallow cream
-1/2 tsp. pure vanilla extract
-1/2 C prepared marshmallow frosting (the same you are using for the cake)
-2/3 C graham cracker crumbs, finely processed in a blender or food processor

1. In a small mixing bowl combine cream cheese, marshmallow cream and vanilla on medium speed until well-combined. Then add marshmallow frosting and graham cracker crumbs until combine. Refrigerate until you are ready to fill your cake. 

To fill cake: Place one cake layer down on frosting pedestal. Add graham cracker filling in the center of cake. Use a knife or an off-set spreading spatula and spread out the filling in an even layer to the edges of the cake. Place the next layer on top and then proceed to frosting the whole cake with marshmallow frosting.  


Marshmallow Frosting:
-1 1/2 C white sugar
-1/2 C water
-2 egg whites
-1/2 tsp. salt
-1 tsp. cream of tartar 
-1 tsp. pure vanilla extract

1. In top of a double boiler combine all ingredients. Stir until ingredients are just combine. If you are using pure vanilla extract, your mixture will look brown. Don't worry; after you beat your frosting it will become white and glossy. While water is heating, beat all ingredients with an electric mixer at high speed for about a minute.

2. Place top of double boiler over rapidly boiling water and beat at high speed until mixture forms soft peaks (peak tops fold over). This took me about 3-4 minutes.

3. Remove pan from heat and transfer mixture into a separate mixing bowl. Continue beating on high speed until stiff peaks form and mixture becomes glossy and thick enough to spread. This took about 2-3 minutes.


4. Frost your filled cake. I like using a rotating cake pedestal for this step. If you aren't an expert at frosting a cake, don't worry because this frosting is forgiving and I think that adds to toasted look of being a marshmallow. In fact, I actually purposefully made the cake have some imperfections in the frosting so that I could get some toasted dimensions on the outside of the cake. 


5. Once you have frosted your cake, take a kitchen torch or a heavy-duty torch on the lowest setting possible to toast the outside. Be careful not to burn the cake. I practiced a few times with a spoonful of frosting before trying to toast the cake. You don't have to toast the top of the cake since it's going to be covered in ganache, but I did anyways so that I would have an even look once the ganache was on. I didn't want to have to battle melting ganache. 


6. Once your cake is toasted, top with cooled ganache and drizzle in on the sides so that it resembles melted chocolate. Make sure the ganache is barely warm or you will melt the frosting. 


Chocolate Ganache:
-4 oz. semi-sweet baking chips
-4 oz. heaving whipping cream

1. Combine baking chips and whipping cream in a microwave-safe bowl. Microwave on high for 1 minute. Stir mixture. If chocolate is not melted entirely, continue microwaving on high for another minute, stirring in 15-30 second intervals. 

2. Allow the ganache to cool so that it's barely warm to the touch. If the ganache cools too much it will become thick like frosting. If the ganache cools too much before you need it, just microwave it 10-15 seconds and stir before you drizzle. Make sure cake and ganache are chilled before assembling the cake.


Assembly of Cake:

1. I like using Wilton Cake boards. You probaly want to get a 10" circle or an 11x13 rectangle. I used the latter since my crackers were a lot bigger. You just need something that you can lift when the cake is assembled to transport it to where it will be displayed. 

2. Place one large cracker on the cake board. Carefully lift the cake and place on top of graham cracker. Carefully place the 2nd graham cracker on top. 


Cut, serve and enjoy! I wouldn't taken a picture of a slice of the cake, but it got eaten too fast! :) Here is the cake with the S'more bar.


Happy Baking!

Here's the printable recipe.